Unlike bulky portable or wall units, only a small hole is needed to link the outdoor compressor/condenser to the stream-lined air-handler mounted inside.  The noisiest and largest parts (the compressor and condenser fan) are isolated outside resulting in saved space as well as less indoor sound pollution.  Ductless Mini Split AC's deliver more Cooling Efficiency per BTU than any other add-on-unit and match the effectiveness of central air conditioning systems without the expense of retrofitting ductwork.

Air Conditioners - Split AC's, Portable AC's, Air Cooler Source
855-382-8110
Mini Split Air Conditioners
Search BY BTU Capacity:
   
 
Inverter Systems
Single-Zone
Dual-Zone
Tri-Zone
Quad-Zone
Quint-Zone (5)
Energy Star
Temperature Control: Portable A/C's, Window A/C's, Air Coolers, Ductless Splits,
Portable AC's >
Mini Wall Splits >
Ceiling Cassettes >
Suspended Ceiling >
Central AC's >
Window AC's >
Air Coolers >
Space Heaters >
Air Purification: IONIZERS, HEPA Filters, UV-TION
Ionizers >
HEPA >
UV/Tion >
Supplies >
Humidity Control: Humidifiers, Dehumidifiers
Humidifiers >
Dehumidifiers >
 
Accessories

Installation Tip:

* MANUFACTURER WARRANTY IS NULL AND VOID WITHOUT BEING COMPLETED (SIGNED) BY INDIVIDUAL HOLDING EITHER LOCAL-STATE HVAC OR EPA LICENSE*


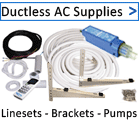
Installing a split AC is easy for any AC company, but can get tricky for a homeowner.  Not only are specific tools and knowledge required to complete setup, but installation includes electrical, gas, and refrigerant connections that are often regulated by a set of laws at the state, local and federal level. As a distributor, we cannot encourage a customer or anybody without HVAC certification to install a mini split system on there own. However, with the help of online recourses we have seen many do it in the past successfully. At the same time seen some customers install a system unprofessionally without performing all the necessary steps, which resulted in issues within the first few months of operation.

In short, you can do all the handyman work yourself and hire an AC company to finish the important - advanced procedures of the installation. For example you can drill the hole in the wall, run the copper lines and connections outside, carefully hang the indoor unit and unpack > place the outdoor unit outside on a concrete pad or flat surface. Then have the HVAC contractor complete the steps you can't perform / don't have tools for (vacuuming the lines, setting gauges, couplings, releasing refrigerant, testing for leaks etc). Also, remember no matter how good an install kit the manufacturer provides, these steps are a must for any mini split installation.  Some online retailers will make you believe there package systems are more user-friendly or a 'plug-n-play' by marketing the install kits as "quick connect".  But this is not true.  Our install kits are quick connect as well, but this doesn't mean the difficult steps are somehow skipped.  Nor does it guarantee a defect free unit.  For example if the copper lines have a small hole and are not tested for leaks, the refrigerant will slowly leak out within 2-3 months, your AC will stop working and you will end up paying $500+ to have the system recharged and lines re-routed for what otherwise would have been a quick free of cost replacement.  So it's worth having it installed the right way.  Local HVAC companies typically charge by the hour for service and above mentioned process should not take more than 1-2 hours (time will vary for each application).  But if they install the whole system out of box, the labor charge will of course be higher.  Doing the simple steps and leaving the hard stuff for the pros not only guarantees a long-lasting system, but also ensures an energy efficient, effective installation. See below short general installation breakdown.


Beginner - DIY Steps:

  1. Unbox outdoor unit and place upright on pad or flat even surface where condenser will be permanently placed.

  2. Locate and drill holes in wall(s) where lineset and electrical wire will be routed to connect indoor and outdoor units.  (this can account for over 50% of install time)

  3. Unbox and mount indoor bracket on area where evaporator will be placed on wall.  (be sure atleast 6 inches from top of ceiling.)

  4. Route 16/4 electrical wire between indoor and outdoor unit completed in step-3 ensuring wiring diagram is followed and matching up labeled terminals to corresponding counterpart.  (example, if L1 is red on indoor, be wire L1 is red on outdoor). Be sure screws are tightened down making solid contact.  *This step can be easier completed with intermediate step-3 if fastened together.

  5. Install PVC – Flex tube for condensation drainage from indoor unit.  If mounted on exterior wall, this step can be skipped.

  6. Secure indoor evaporator to bracket mounted in step-2.

  7. Any filtration medias or remote control brackets can also be installed.


Intermediate – Handy steps:

  1. Verify correct source voltage and breaker sizes on outdoor circuit panel.  (Fuse size can be found on system specification and ETL label on side of Condenser).

  2. Using proper gauge wire (based on Fuse size), connect source voltage from circuit/breaker box to outdoor terminal block.  3 wires including ground. EX: 12AWG for 20A - 10AWG for 30A

  3. Carefully unravel and route copper lineset between indoor and outdoor unit through channel completed in beginner step 3.  Ensure to not kink or remove dusk caps from copper lineset when routing through wall.  * Leave this step for contractor if many bends and turns.


Advanced – Professional steps:

  1. Final Coupling: Remove dust caps from lineset and secure flared connections between lineset and liquid-gas ports on outdoor unit. *Apply proper torque.

  2. Pull vacuum down to 500 microns utilizing vacuum pump.)

  3. Ensure vacuum holds at level for atleast 45 mins.

  4. Release pre-charge via shrader / hex-key and add any additional refrigerant if lineset extended beyond pre-charge length.

  5. Verify pressure on low side gas port standing at correct PSI level.

  6. Verify operating pressure fluctuating with adequate cooling and heating exchange.

  7. Fill in license number and sign product registration.


Featured Products
3 Ton INVERTER: 16 SEER
36000 BTU Inverter Mini Split AC and Heat Pump
T316S-H236
$1924.45
Mini Ductless Split Air Conditioner and Heater : AMD213HX
3 Ton quad-zone: 12k x 4
4 Ton Mini Split
T322D-12121212
$2879.45
Mini Ductless Split Air Conditioner and Heat
1.5 Ton Dual Ceiling AC
24000 BTU Ceiling Cassette 12k x 2
T121DC-12+12
$1824.45
Mini Ductless Split Air Conditioner and Heater : AMD213HX
1 Ton AC-Heat: 16 SEER
12000 BTU Dual-Zone 9000 BTU Inverter Mini Split AC and Heat Pump
T1E16S-H212
$589.45
Mini Ductless Split Air Conditioner and Heater
4 Ton Dual Zone: 24k +24k
4 Ton Mini Split Air Conditioner
T321Q-24+24
$3564.45
Mini Ductless Split Air Conditioner and Heater : AMD213HX
2 Ton Dual Ceiling AC
24000 BTU Ceiling Cassette 12k x 2
CSY-24HP-CEIL
$2678.45
Mini Ductless Split Air Conditioner and Heater : AMD213HX
1.5 Ton dual-zone: 9k x 2
1 Ton Mini Split
T321D-9+9
$1574.45
Mini Ductless Split Air Conditioner and Heat
2 Ton AC-Heat: 21 SEER
12000 BTU Dual-Zone 9000 BTU Inverter Mini Split AC and Heat Pump
T321S-H224
$1299.45
Mini Ductless Split Air Conditioner and Heater
Call Thermospace at 855-382-8110
 
View the Mini Split FAQ Page >
View the Installation - Setup Diagram >
View the Mini Split Overview Page >
View the Mini Split Installation Tip >
line
View All Ductless Mini Split Systems >
View Only Inverter DC Ductless Splits >
View Energy Star Energy Star Qualified Mini Splits >
View Ceiling Mounted Ductless Systems >
GO TO SUPPLIES AND ACCESSORIES >
 
9000 BTU | 12000 BTU | 18000 BTU | 24000 BTU | 30000 BTU | 36000 BTU | 48000 BTU | 60000 BTU
 
Single Zone line Dual Zone line Tri Zone line Quad Zone   Quint Zone
 

Verisigned Paypal accepted

Home - Contact - About - Privacy Policy - FAQ - Site Map


Copyright © 2003-2024 Thermospace Inc.


128 Bit
Number of Cart Items:  0 | Total:  $0.00
View Cart   Checkout